Upgrade an existing book from Jupyter Book 1
Use automated tools to upgrade a legacy (Sphinx-based) Jupyter Book project to the new MyST Document Engine.
Structure of a legacy book
Before we can upgrade a Legacy Book, we must first discuss its important files and structure. Jupyter Book 1 uses the Sphinx documentation engine to build each book into publication-quality books and documents. Sphinx was originally designed for documentation generation, such as https://
Table 1:Legacy Book configuration files.
| Filename | Purpose |
|---|---|
_toc.yml | To define the documents that comprise the contents of a book in the form of a site-map. |
_config.yml | To define configuration options that customize the content, structure, and style of a book. |
The most important files in a Legacy Book are the _toc.yml and _config.yml files described in Table 1. These files control what a book contains and what it looks like.
An example Legacy Book can be seen at https://my_book directory, there are a number of files including _toc.yml and _config.yml:
$ git clone https://github.com/jupyter-book/legacy-demo-book
$ cd demo-book
$ ls ./my_book
_config.yml
content.md
intro.md
logo.png
markdown.md
markdown-notebooks.md
notebooks.ipynb
references.bib
_toc.yml
Program 1:Contents of the Legacy Book at https://
#######################################################################################
# A default configuration that will be loaded for all jupyter books
# See the documentation for help and more options:
# https://jupyterbook.org/customize/config.html

#######################################################################################
# Book settings
title                       : My Book  # The title of the book. will be placed in the left navbar.
author                      : Captain Jupyter  # The author of the book
copyright                   : "2024"  # Copyright year to be placed in the footer
logo                        : logo.png  # A path to the book logo

# Force re-execution of notebooks on each build.
# See https://jupyterbook.org/content/execute.html
execute:
  execute_notebooks: force

# ...
Program 2:Extract from the _config.yml file defined in https://
# Table of contents
# Learn more at https://jupyterbook.org/customize/toc.html

format: jb-book
root: intro
chapters:
- file: markdown
- file: notebooks
- file: markdown-notebooks
Program 3:The _toc.yml file defined in https://
Some advanced books may have chosen to migrate away from Jupyter Book’s configuration files, and use Sphinx directly. These books do not define a _config.yml, instead they utilise a Sphinx-style conf.py file. Jupyter Book does not support upgrading books from Sphinx sites, for now.
Upgrading a legacy book
Now that we know what a Legacy Book looks like, we can compare its structure with a New Book.
The new Jupyter Book has a single configuration file myst.yml. See Program 4 for the myst.yml that corresponds to Program 2 and Program 3:
version: 1
project:
  title: My sample book
  authors:
    - name: The Jupyter Book Community
  github: executablebooks/jupyter-book
  bibliography:
    - references.bib
  exports:
    - format: pdf
      template: plain_latex_book
      output: exports/book.pdf
  toc:
    - file: intro.md
    - file: markdown.md
    - file: notebooks.ipynb
    - file: markdown-notebooks.md
site:
  options:
    logo: logo.png
  template: book-theme
Program 4:Contents of the myst.yml file that corresponds to Program 2.
It can be seen that Program 4 has a toc section that looks very similar to Program 3. This style of defining a TOC is designed to be easier to read and write.
Jupyter Book will automatically upgrade a Legacy Book to a New Book if it detects the _config.yml file described in Structure of a legacy book. To do this, we need to run the new jupyter book command in the Legacy Book directory. Let’s try this tool with the example book given above.
First, let’s confirm that we’re now using the new Jupyter Book tool:
$ jupyter book --version
v2...
We can then run the jupyter book command, which will detect the Legacy Book and ask to perform an in-place upgrade:
1 2 3 4 5 6 7 8 9 10 11 12 13 14 15 16 17 18 19 20$ cd book $ jupyter book Welcome to the Jupyter Book (via myst) CLI! 🎉 🚀 jupyter book init walks you through creating a myst.yml file. You can use Jupyter Book (via myst) to: - create interactive websites from markdown and Jupyter Notebooks 📈 - build & export professional PDFs and Word documents 📄 Learn more about this CLI and MyST Markdown at: https://mystmd.org ? 📘 Found a legacy Jupyter Book. To proceed, myst needs to perform an upgrade which will: ‣ Upgrade any Sphinx-style glossaries to MyST-style glossaries ‣ Upgrade any case-insensitive admonition names to lowercase (Note → note) ‣ Migrate configuration from _config.yml and (if applicable) _toc.yml files ‣ Rename any modified or unneeded files so that they are hidden Are you willing to proceed? (Y/n)
Pressing Y will start the upgrade process, during which time Jupyter Book reports the steps that take place, e.g. the lines highlighted in Program 6. For this particular book, the configuration files from the Legacy Book are migrated:
1 2 3 4Are you willing to proceed? (Y/n) Yes 💾 Writing new config file: myst.yml Migrating Jupyter Book configuration to myst.yml Migrating TOC to myst.yml
We can see that the migration step has created some Hidden Files (see Program 7). This ensures that you can recover the original files if something goes wrong during the upgrade.
1 2 3 4 5 6 7 8 9 10 11 12 13 14$ ls -a . .. _build ._config.yml.myst.bak intro.md logo.png markdown.md markdown-notebooks.md myst.yml notebooks.ipynb references.bib requirements.txt ._toc.yml.myst.bak
Program 7:Contents of an Legacy Book upgraded with the new jupyter book command.
Finally, Jupyter Book then asks us whether we’d like to run jupyter book start.
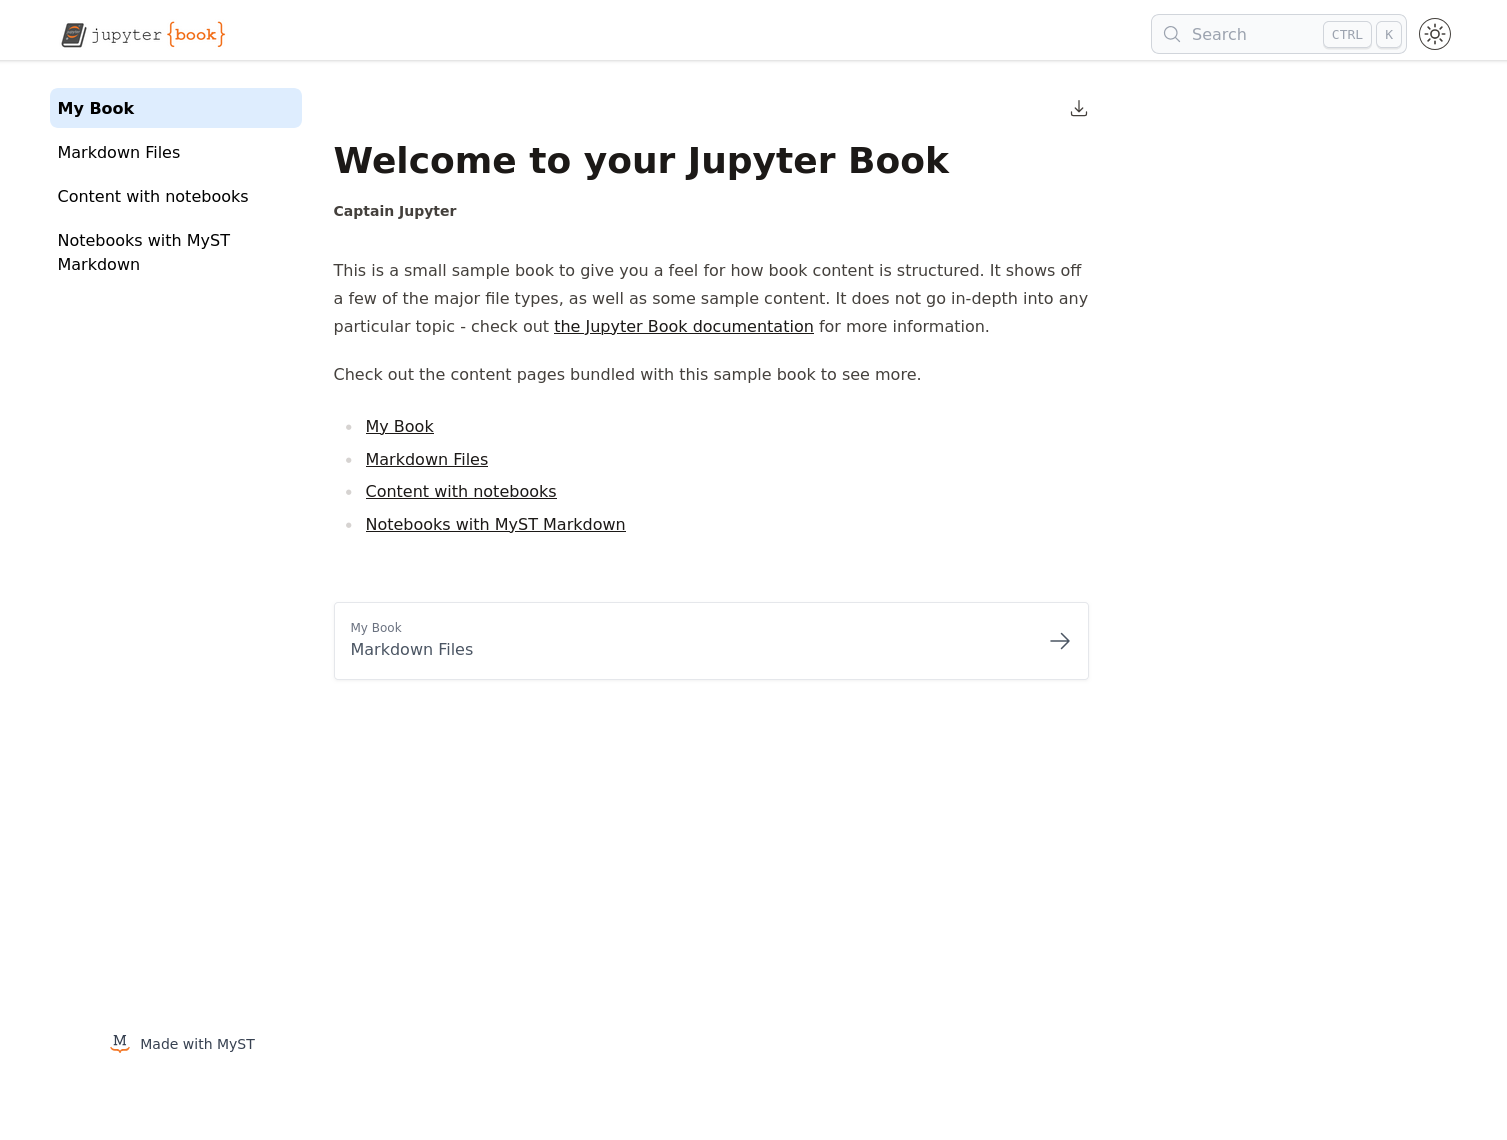
? Would you like to run jupyter book start now?We can press the y key in this terminal window to launch a MyST webserver. Clicking the generated link (or pasting it into a new browser tab) will allow us to preview our site and see changes quickly reflected in the browser (see Figure 1).

Figure 1:Browser screenshot of the URL generated by jupyter book start.